

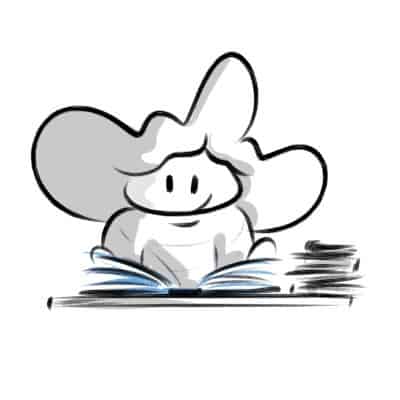
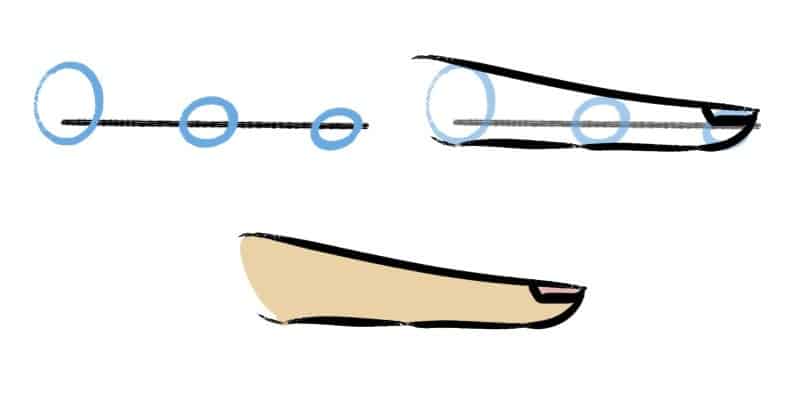
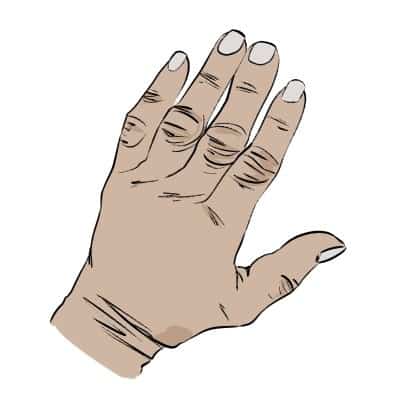
How To Draw Ok Hand Sign
A lot of people tell me that the thing they feel more complicated to depict is the hands!
I've ever had a kind of dear-detest human relationship with hands.
Considering I e'er loved to watch hands on cartoons or illustrations and how much emotion they can convey!
And so I wanted to do that every bit well.
The problem was the part of figuring out the position and how to describe the hands.
UPDATE: If you're interested in watching this in video format, I've added a section to my Figure Cartoon grade education you lot how to draw Hands step by step! Catch information technology here with a discount: Introduction to Figure Drawing.
Hither you'll larn how to depict hands step past step, using simple shapes.
Nosotros'll go over how to describe the fingers and thumb, also equally different kinds of hands and fifty-fifty going over all the details that you can add!
Getting Hand Reference Photos and Poses
I ever like to start with references.
Information technology'south very important to go the right paw reference photos and poses for you to use.
This will assist you draw better and more believable easily much faster!
Besides photo references that you can go (and that I volition talk about right afterward), one astonishing reference that you can get is an Articulated Paw Mannequin (click to cheque it out on Amazon).
I highly recommend this if you're struggling with drawing easily!

I've even talked about it in my Recommended Tools article well-nigh mannequins.
Having a mannequin that you tin pose effectually and change the lighting on is priceless!
Every pose that you tin can imagine, you can pose it.
Other than that, permit's talk nearly a few other photo references for drawing hands.
I love Pinterest.
As an artist, the amount of quality photos that you can get there to apply as inspiration and reference is nigh space.
Thousands and thousands of photos are posted there each day. Sure, some may not have amazing quality, only most of the times you tin can find whatsoever you lot're looking for.
Also, even if they don't accept super high "studio" quality, that tin can be a skilful thing.
Having a random photograph that someone took with their phone can assist you create a more realistic cartoon.
To go photograph references for hands on Pinterest you can endeavor searching "hand photography" and see what comes upwards.
Only if y'all desire to save the trouble of searching throughout thousands of images, I've created a specific Pinterest lath with the best hand references I could discover!
So hither's my Hand Reference Photos for Artists Pinterest lath!
Magazines
Another fashion to find proficient photos to use as a reference is past looking through magazines.
This is especially adept if you already have a few magazines that you lot bought and are just lying effectually. And well, if not, you can always just go buy a few magazines that you like and search through in that location!
My all-time recommendation in terms of Magazines is to get Fashion Magazines orJewelryrelated magazines since those tend to have lots of hands.
Take Your Own Photos
Hither'southward another great option for getting good hand pose references, have your own photos!
Doesn't really matter if yous have a high-quality camera or non, catch your phone and accept pictures of the poses y'all want.
This is something that I've done when looking around for hand references when writing this post.
Since I couldn't find the specific poses that I wanted I just took a photo of them! I've also included all those photos as a downloadable resource at the end of this article. And then stick around for that and experience complimentary to employ them anywhere!
I talk all about Art References and Resources for Artists on a lengthy article with several examples and websites, so if y'all'd like to read more, cheque out my Commodity!
Drawing Hands Step By Step
Alright, time for exercise!
First of all, we're starting with the basics of basics.
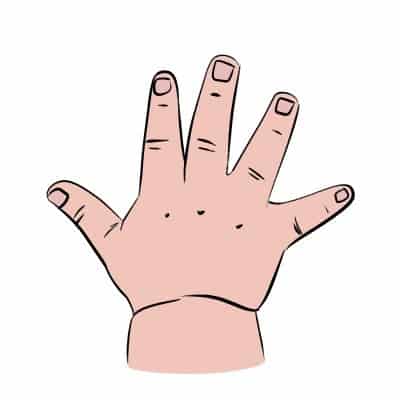
A simple open hand, and then you can smash down the main shapes you'll use for almost any position!
In that location are two ways you can go virtually it, the first way is: take a photo, open up information technology on your drawing software of choice or print it. Draw on peak of it.
Tracing your photos is ever a good mode to learn the shapes. A lot of times, when learning to describe something new, this is how I go.
The 2nd way is following the next steps! I've done part of the job for you.
So only follow the steps beneath and let's chief drawing hands!
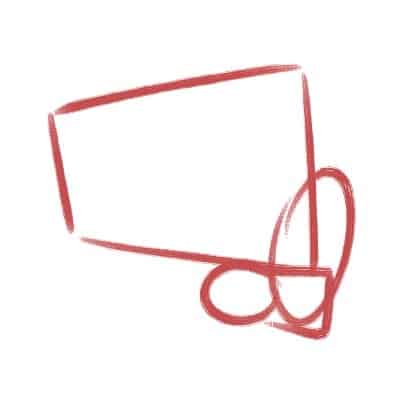
Outset With The Palm
This is where I start. For the palm of the hand, nosotros make almost a square shape, a bit rounded and going thinner on the bottom.
Pay attention to the arched line we draw here, it's very of import!
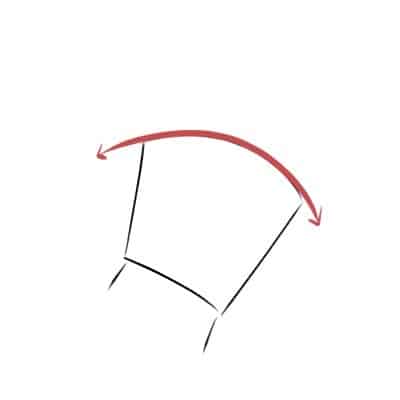
If you look at your hands, yous'll observe that the line where your fingers touch the palm of the hand is normally curved.
This is important to figure out our next shape and its position.
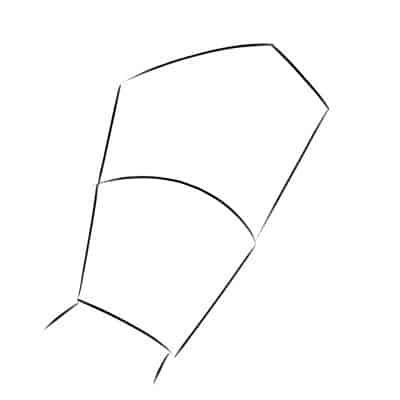
The Finger Arc
Alright, so half our hand is washed.
Now for where our fingers will exist: above the shape, we repeat the same curved line that nosotros did before.
So, in brusque, you'll always have the same bend!
Unless you really want to exaggerate your hands and try out different styles, of form.
With this new line, you lot just need to close the shape and at that place y'all become! We have a complete hand.
Now we just demand to draw the shapes for each finger.
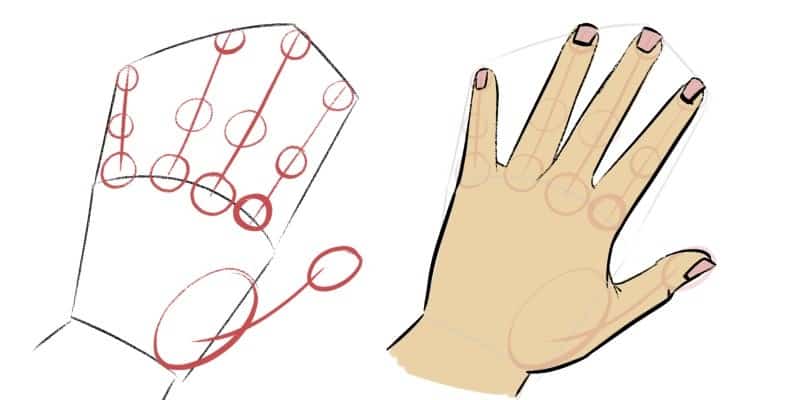
Cartoon the Finger Joints
If y'all find it easier, especially in the beginning, this might be the best mode to figure out each finger: Circles.
Draw a circle for each joint, including the thumb.
When you lot're finished, you but need to connect each circle, with a line around information technology:
How to Draw Fingers (The Thumb Is Pretty Dissimilar)
The fingers have lots of details and unlike ways to draw them, depending on their position or how they're flexing.
And the thumb is a whole different shape and way!
So let's see how to draw them in more detail.
I of the best means is to draw the finger flexing and extending.
There are many stages for the flexing of a finger, let's go for the three main ones:
Stretched Fingers
We already went through this 1 in the steps above, but let'south go through information technology again very quickly.
Draw a horizontal line. Now allow's add the joint circles. When all the shapes are done, nosotros just demand to connect them, with a unmarried line.
As you tin can see, we are viewing our finger from the side this time, so information technology looks a bit different. The peak part of the finger is very straight, but the lesser is more rounded.
Half Flexed
Allow's start once more, with a line. Most like a pikestaff, simply laying down.
Afterward, we do our circles: one at the beginning of our line, one in the first corner and the final in the second corner of our line.
Once more, we just need to connect everything upward!
As you can see, the exterior function of the finger has very straight lines, while the inside has lots of curves.
This is the way your fingers will e'er comport, and so call up these shapes!
Flexed
Alright, terminal position. The finger hither volition be completely flexed. We can draw a square shape or a square spiral.
At present, as always, add the circles and join everything together.
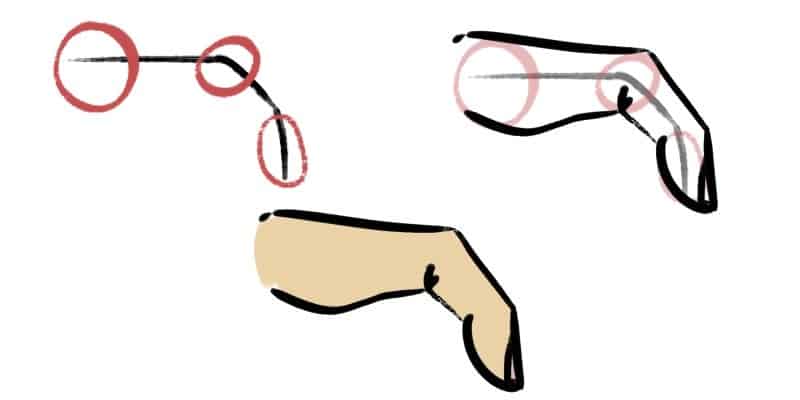
Thumb and the Circumvolve in the Palm
The thumb is a bit different to draw.
As you lot noticed before, nosotros start with a circumvolve in the palm, from there, if information technology helps yous, you can draw a curved line, going outside the hand.
If non, you can jump to the next office: Draw a rectangle and so a circumvolve.
Drawing The Knuckles Of The Manus
Drawing a closed manus is completely different than the open hand!
1 of the biggest differences here is that we encounter a whole lot more than of the knuckles, so that will be fun!
They indicate out of the hand, near like peaks of mountains or waves in the ocean. And depending on how difficult the hand is endmost, the angrier and sharper they'll wait!
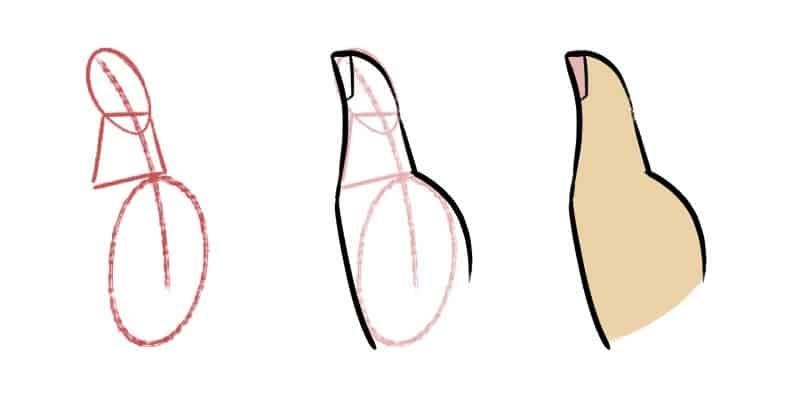
Knuckles From The Side
Here, the knuckles won't be as noticeable, simply it'southward a very mutual position to draw.
Offset with a squared shape.
On the bottom of this shape, draw a circle so a rectangle. This is our thumb.
Since it'due south flexed, we tin't run into the whole pollex, so we leave the circle office behind us.
We already drew a flexed finger, and then nosotros already know how to exercise it: draw a square spiral and add the circles if you prefer.
I ordinarily sit them out when cartoon a fist, since information technology will exist also cluttered, so the spiral should be enough.
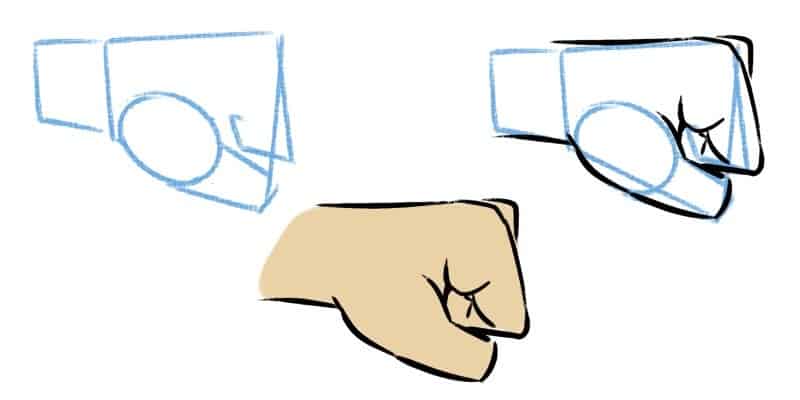
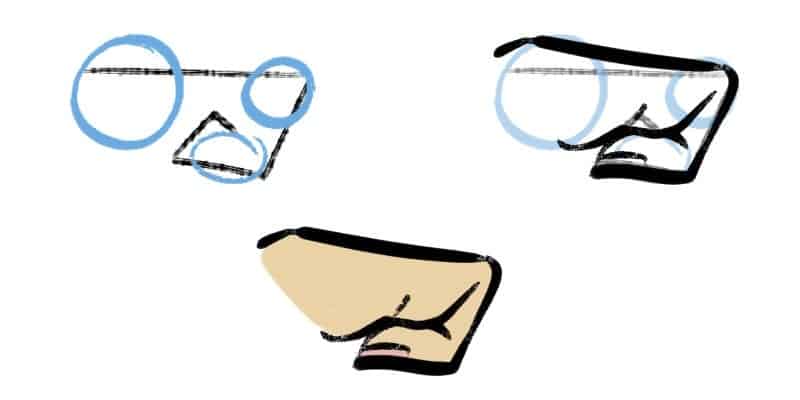
Knuckles From The Front
I experience that this one is the easiest to do!
Showtime with a rectangle shape, but this one is quite irregular, going upwards, almost like a chart or a mountain.
At present our thumb will appear in forepart of the rest of our fingers. So draw a rectangle and circle in front of the main shape.
And behind it, a circle for the rest of the thumb.
At present, all we need is to add the knuckles and fingers. So, once more, let's go with circles!
The middle finger will have its knuckle at its highest point and for the pinky, the lowest.
Now we merely demand to clean everything up and add the details.
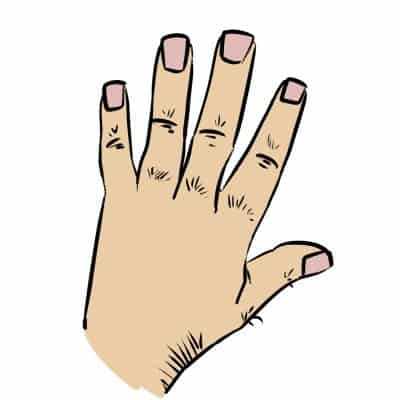
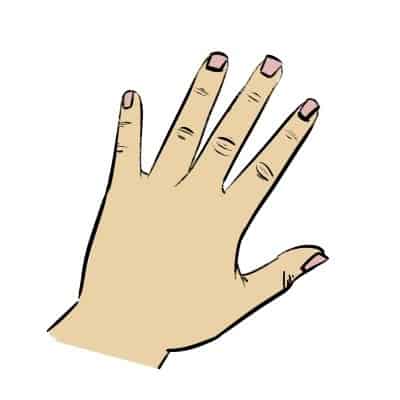
Differences Between Masculine And Feminine Easily
At that place are many types of hands and each person is unlike.
But generally speaking, when cartoon hands, especially when going for a more than cartoony style, nosotros tend to describe hands differently.
Feminine hands tend to have elongated fingers, merely more delicate and slim.
When drawing masculine easily, we normally become for broader hands and very thick fingers.
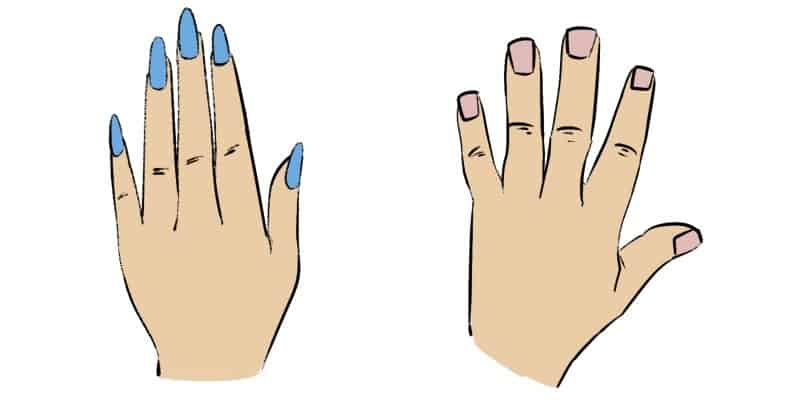
The same goes for the nails.
With feminine easily, we draw more than stylized nails and even longer than normal.
If the character we're doing asks for it, nosotros fifty-fifty add nail polish of unlike colors!
For masculine hands, we usually go for very simple nails, sometimes very squared and large.
Adding Details To The Hands
There are lots of minor details that you can add to your grapheme's easily.
If you want to give more expression to your hands, you can practise that by adding details.
The poses of the hands will already assistance you with conveying an emotion, but the details will add together so much more than to that!
We've already washed some nails and an actress line here and there, but let's get over each detail that y'all can do!
Drawing Hair in the Hands
We always have some hair on our fingers and the back of our easily.
This is unremarkably more noticeable in men.
So if you're cartoon a male person character that happens to be very hairy, don't forget to add some of it on their hands.
Get simple or exaggerate with all the hand hair!
It's your graphic symbol and you know them better than anyone.
Experiment a lot and run into what works best. And, as always, have fun!
Cartoon Hand Wrinkles
This is all about taste.
For me, I ordinarily leave these ones out, simply yous might adopt to have a more realistic feel or very stylized.
When you look at your hands, the knuckles take some wrinkles.
You can add them to your drawings!
They fit very well if you lot're drawing either men or older people, where these are more noticeable.
Try different weights on your lines, to requite them more or less forcefulness.
Allow's say your graphic symbol is someone who works very hard, especially with their hands.
Then, these wrinkles can be very noticeable, to convey this idea amend!
Cartoon Fingernails
Nosotros already drew some, merely once more, there's a lot of styles that you endeavour and experiment with.
People have different fingernail types, so explore that in your drawings.
If yous're cartoon a adult female, that is very careful with her looks, then her nails volition also expect the part!
Elongated nails with pointed ends and fifty-fifty with a different color.
If your grapheme tends to chew on their nails, and so, maybe they'll wait very short, going beneath their usual level and even a flake irregular.
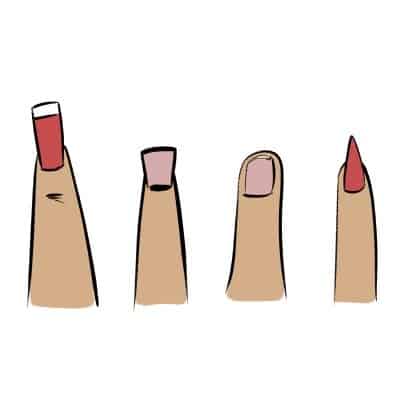
The nails tin can also be very pointy or circular and fifty-fifty squared.
You can them in different sizes and styles and you tin can even mix and match these styles in 1 graphic symbol!
Drawing The Palm Lines
Finally, the palm lines.
When we drew our commencement hands, we drew them from the dorsum.
If you want to describe a hand facing towards you lot, the shapes will exist exactly the same.
The only difference here is that we'll take some extra lines decorating the paw.
Nosotros have dozens of tiny lines all over our palms, merely let'southward focus on the main ones: the thumb line and two horizontal lines above it.
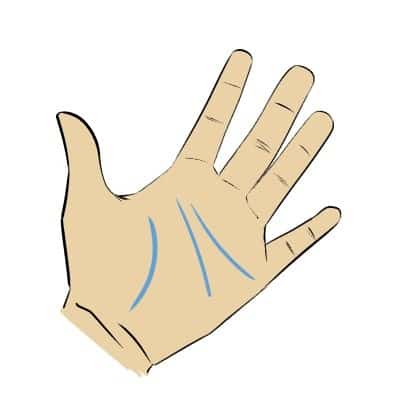
These are the ones you'll desire to focus and they'll usually look the same every fourth dimension.
Just you lot can experiment with unlike kinds of curves and, once again, on how much force per unit area you utilize to these lines.
If you lot're drawing older characters, for example, these lines might stand out more than!
How To Draw Old Hands
Recall about your character and their age.
As you draw their hands, they'll look unlike depending on how aged the character is.
If you're young, you'll notice that your hands are very uncomplicated.
About no marks and definitely no wrinkles on the backs of the easily.
If you lot're drawing someone erstwhile, and then their hands will look different.
Expect up on Pinterest or ask to have mitt photos of someone older in your family.
Put their hands next to yours and you'll clearly run across the differences.
Generally speaking, the pare becomes looser, which means that you'll see more wrinkles on the hands.
Another detail you can add together is freckles and dissimilar colored spots on the hands.
This is very common to come across on older people, so take reward of that in your drawings!
Some other matter that is worth mentioning, is that equally you age, your easily tend to become thinner, so pay attention to that as well, when drawing old easily.
Apart from this, another lilliputian item yous tin add is some scars.
Both in immature and older characters.
We use our easily a lot and information technology's more than than common to get some scars in them.
I sure tin can count some on my hands, but information technology might also be because I'yard just too clumsy. Oops!
Look for different manus references, take pictures of people y'all know, of any age.
Compare them and find the differences. Now, you just need to do your drawings!
How To Draw Baby Hands
When drawing old hands, nosotros focus on thinner hands and lots of wrinkles, infant hands are nearly the reverse!
Hither round shapes rule.
Babies tend to be very chubby, so accept advantage of this, past exaggerating how round their hands and overall features volition be!
Other than that, the hands will unremarkably be smaller, particularly the fingers.
Imagine baby carrots on a circumvolve, draw them.
Those are your main shapes, now you just need to make clean up everything and add some details.
For this office, in that location isn't much to do.
Very small fingernails and picayune dots for the knuckles, like lilliputian dimples on the back of the hand!
Again, look up pictures on the net.
Take photos (if you can, babies similar to move a lot sometimes, so good luck!) and even written report some cartoons.
If you desire to go for a cartoony style, this is always a good place to go.
Cartoon movies from Disney, Pixar, Dreamworks, and many others are a good place to get inspiration and to learn.
Watch how they develop their styles over the years and how they create unique characters, not only with their wardrobe or faces but hands also!
Search, observe, experiment and practise.
These are your only rules for learning how to draw.
And, of course, accept fun!
Hand Cartoon Tools Online
If you want some exercises to perfect your hand drawings there are some really awesome online tools for that.
I mentioned a lot of times, here and on my Figure Drawing course, some websites where you tin can practice gesture drawing.
And these are not only adept for posing in general and drawing the whole human torso but also hands or other particular parts of the body!
Let's meet some examples that I particularly similar and utilise a lot.
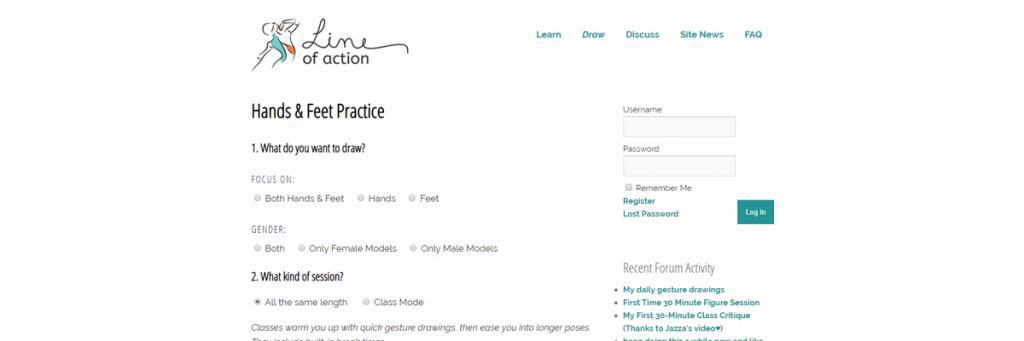
Line of action
This is a super clean and very helpful website with a cool drawing tool, Line of Action!
With this tool, you merely choose a few settings similar male, female and others, and then you tin can select how much time you'd like to practise each pose and you striking the beginning push button "Get Cartoon"!
The tool lets you choose betwixt Easily, Anxiety or both hands and feet, then if yous want to practice feet as well, that's a bonus.
If you're still get-go to learn how to describe hands I would recommend setting it up to 60 seconds or ii minutes. Later on, y'all can attempt the thirty seconds version too.
In my stance, it'due south very good to have a shorter time and then that you can focus on the primary shapes and not overthink the small details.
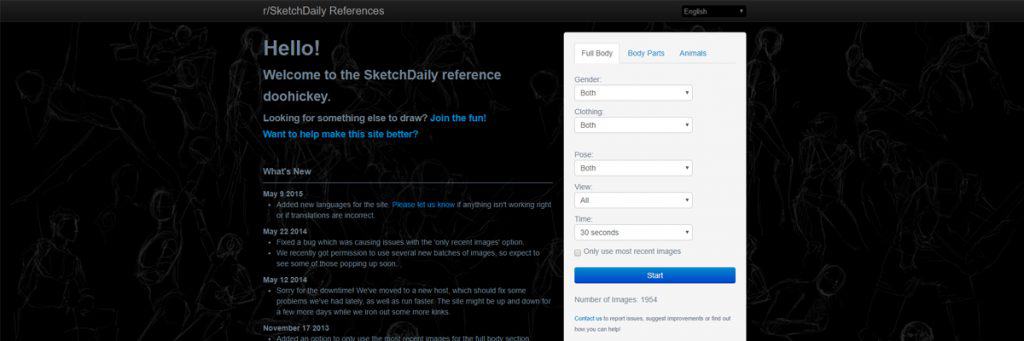
Sketchdaily References
Another very similar (and helpful!) drawing tool, Sketchdaily References.
Too has a bunch of unlike photo references and so if you've used the previous website a lot, change to this one for a while then you don't get as many repeats.
To utilise information technology simply click the "Trunk Parts" link upwardly tiptop, select "Hands" in the parts dropdown, the Gender you'd like.
You can likewise cull the View, the Time (I recommend the 1 to ii minutes for beginners) and click Start!
Once you get used to the time, try to change it to 30 seconds and run into what you can become out of it.
It might be hard and the time might feel like it's too curt.
But the more y'all practice, the more than you will amend and create better drawings in a shorter amount of time.

Quickposes
Final one!
Quickposes is another website that you can use to become a bunch of dissimilar poses.
It has all the standard options like the ones before and you can choose how many images yous'd like to draw in one session.
I interesting feature of this website is that you can choose to brandish the images upside down.
Which makes for an interesting challenge if you're up for it.
Alright, that should be enough for now, you've got a lot of tools to utilize! Give them a attempt and see which one y'all like the about.
Mitt Reference Photos Download
As a bonus, hither are a agglomeration of photos on a white groundwork that I've taken to use as reference!
There are both male and female hands (mine and from my boyfriend) and a lot of different poses from several sides.

Click hither for the Hand Reference Photos Download
This includes over 100 photos and 2 videos of hands!
Yous might even recognize some of these since I've used them in this article and to practice.
You can use these hand photos in your drawings and fine art as you wish.
Lots of pictures for yous to use, and so remember to practice a lot!
A Quick Epitomize On How To Draw Easily
Start with simple shapes and you lot'll run into that your drawings will better immensely!
Drawing doesn't need to exist difficult.
Nosotros simply like to overcomplicate things sometimes.
Before reading this commodity, you might have felt that cartoon hands was a nightmare.
Now, hopefully, you lot experience that it'south much easier and you lot feel more motivated to draw hands on your characters!
No more than hiding your grapheme'due south hands behind their back, we are ameliorate artists at present and we're not agape of hands anymore.
Cartoon hands IS fun!
Sit down downwards, get some images for reference and relax while practicing some good hand drawings.
Back to the Weblog


How To Draw Ok Hand Sign,
Source: https://doncorgi.com/blog/how-to-draw-hands/
Posted by: cartercamestich1950.blogspot.com
0 Response to "How To Draw Ok Hand Sign"
Post a Comment