

How To Upload A New Template Into Docusign
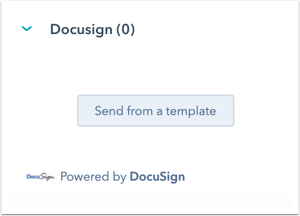
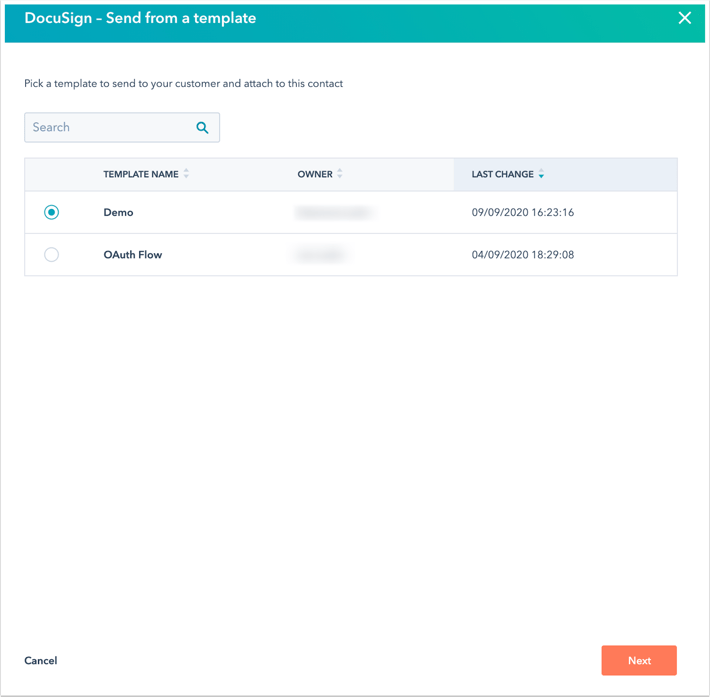
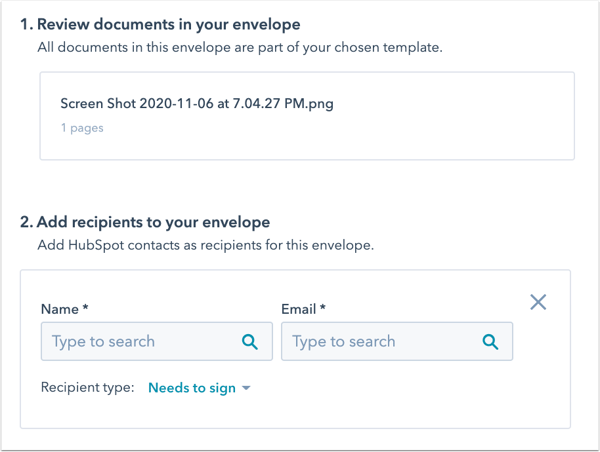
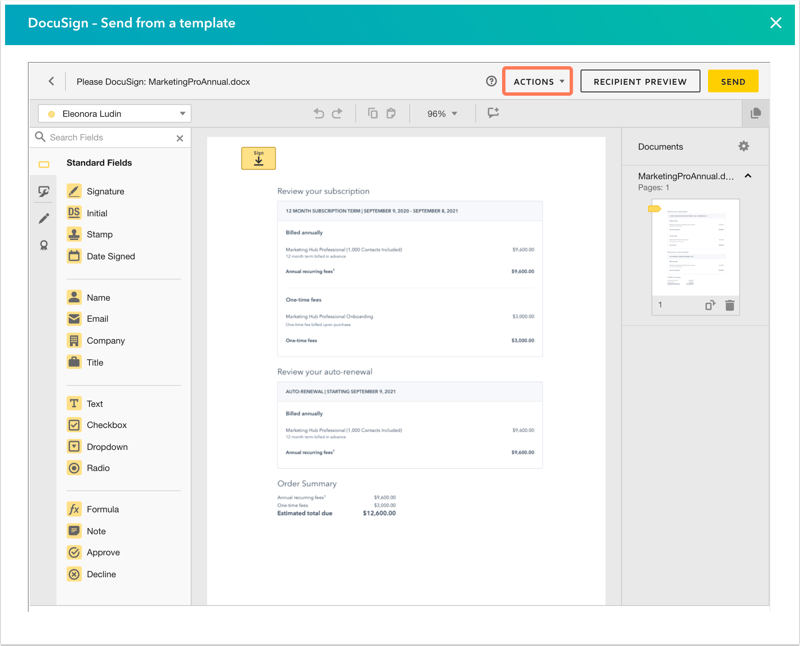
Use the DocuSign integration to create, customize, send and rail DocuSign envelopes from a contact, visitor or bargain tape in your HubSpot account. Please note: you cannot sync information most contacts, companies, deals or documents between HubSpot and DocuSign. You lot must be a Super Admin or takeApp Marketplace permissionsin your HubSpot account. You can select an envelope template from your contact, company and deal records. When a template has been selected y'all can add together recipients and edit your field of study line and message. Click the name of a record. 1. Review documents in your envelope: verify the documents in your selected template. You can insert HubSpot data, such every bit information from your contact, company, or bargain records, directly in to your DocuSign template. Only predefined HubSpot fields can exist used in your DocuSign templates and and fields added straight in the HubSpot embedded view willnot exist applied. To utilize your HubSpot fields in DocuSign: Delight notation: data will only be populated for the object record that the template is beingness created from. For instance, if you're creating a template from the deal record, onlydeal backdrop will be populated. You tin can trigger workflow deportment from DocuSign events in contact workflows. In your HubSpot account, navigate to Automation > Workflows. When your workflow is turned on you lot may encounter some error letters: You can resolve this error by navigating to your DocuSign template and ensuring you take the correct amount of placeholders or recipients added. This mistake relates to Contacts or Deals but. Y'all tin can resolve this mistake by navigating to your DocuSign template and ensuring y'all have the correct amount of recipients added. This error relates to Contacts only. You tin can resolve this error by navigating to your DocuSign template and ensuring you lot have the correct documents added. If the number of deal contacts is more than the number of placeholders in your template HubSpot volition cut off the contacts list to the placeholders size and add simply these contacts will receive the envelope. For instance, if you have three contacts and merely 2 placeholder on the template, only the first 2 contacts will be added. Please ensure that your template contains enough placeholders for the number of contacts yous wish to transport the envelope to. If the recipient e-mail is equal to the contact e-mail, HubSpot volition skip auto-populating contacts from the HubSpot record. Integration requirements
Install the integration
Use the DocuSign integration
Create and send documents
2. Add together recipients to your envelope by searching your HubSpot contacts. When sending an envelope from a contact or bargain tape, the name and electronic mail of the recipient volition be motorcar-populated.
3. Customize the email message for your recipients: add together an E mail subject and Message for recipients. If you want to write a different bulletin for each recipient select the Custom email message for each recipient check box.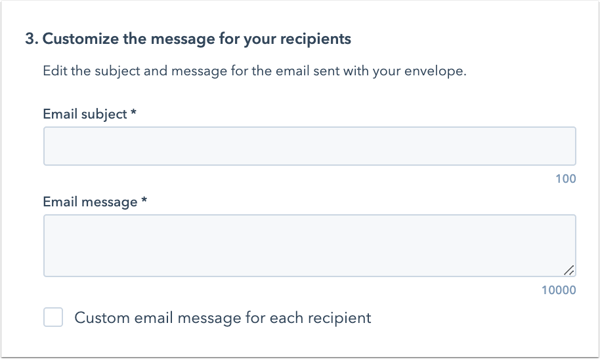
Use HubSpot fields in your DocuSign template
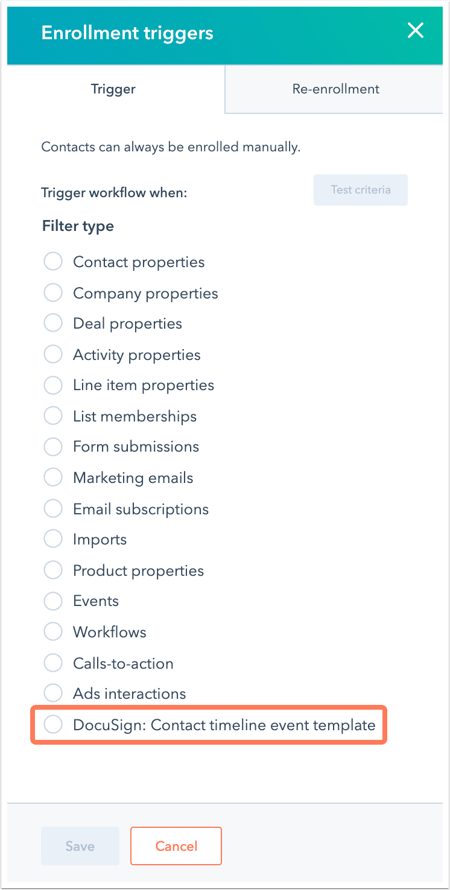
Use DocuSign events to trigger workflow actions ( Marketing Hub, Sales Hub and Service Hub Professional and Enterprise)
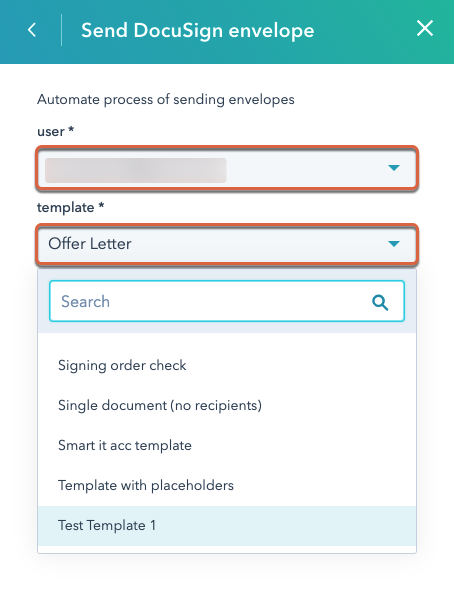
The DocuSign workflow template does non have whatsoever placeholders or recipients.
The DocuSign workflow template does not take any recipients.
The DocuSign workflow template does not accept whatever documents fastened.
The number of deal contacts is more than then placeholders in template.
Auto-population for deal contacts was limited to number of placeholders in your template. OR Your contact wasn't auto-populated every bit new recipient because template contains same email.
Manage your DocuSign settings
View your mapped fields
Add a HMAC security key

Change your connected DocuSign account
If you are a user in multiple accounts, all accounts will exist connected to HubSpot.
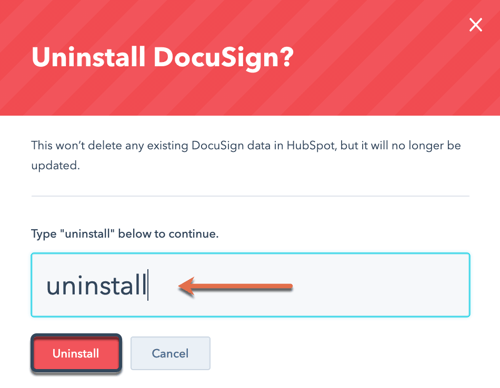
Uninstall the DocuSign integration
Integrations

How To Upload A New Template Into Docusign,
Source: https://knowledge.hubspot.com/integrations/use-hubspots-integration-with-docusign
Posted by: cartercamestich1950.blogspot.com
0 Response to "How To Upload A New Template Into Docusign"
Post a Comment